WSG Appliance Installation Guide
From Wiki of WFilter NG Firewall
Contents |
1 Overview
2 Front Panel Description
2.1 6/8 Ports Model
2.2 4 Ports Model
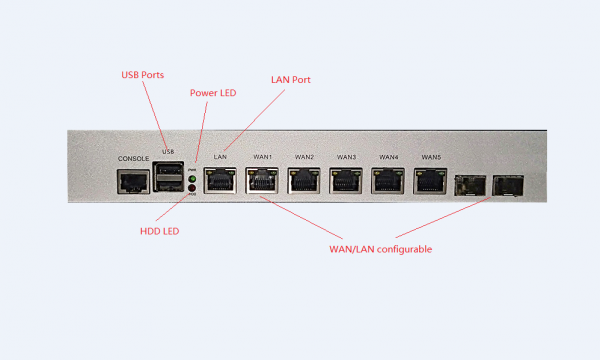
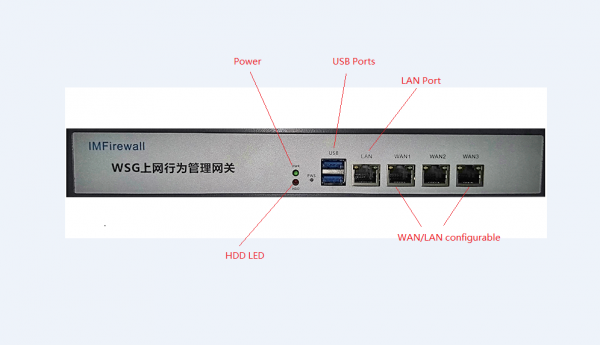
Front Panel:
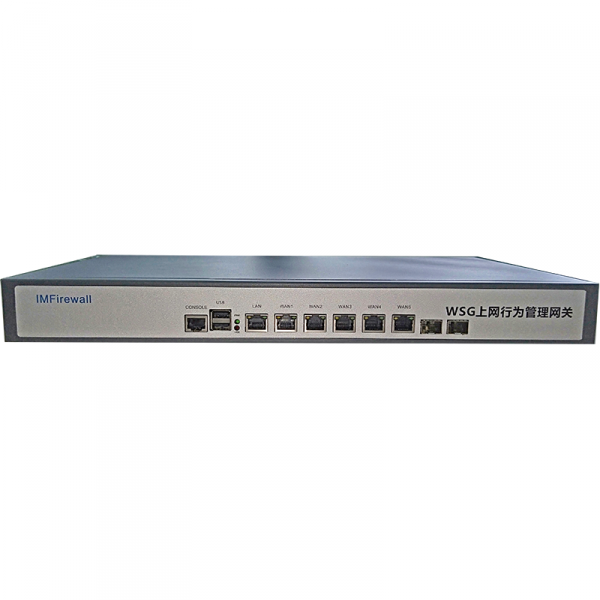
- LAN ports: 100/1000 ports, shall be connected to lan switch.
- WAN1 - WAN5 ports: 100/1000 ports, can be configured as WAN or LAN.
- USB: for USB keyboard and other USB devices.
- Power LED.
- HDD LED.
- Power switch.
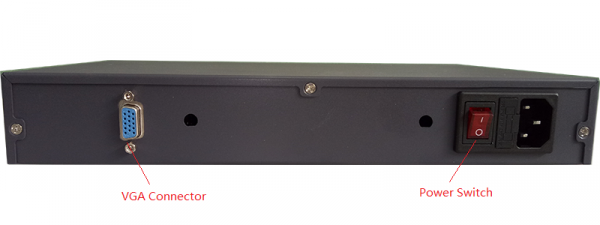
Rear Panel:
- Power connector.
- VGA connector, can be connected to a VGA monitor.
3 Gateway Deployment
3.1 Topology
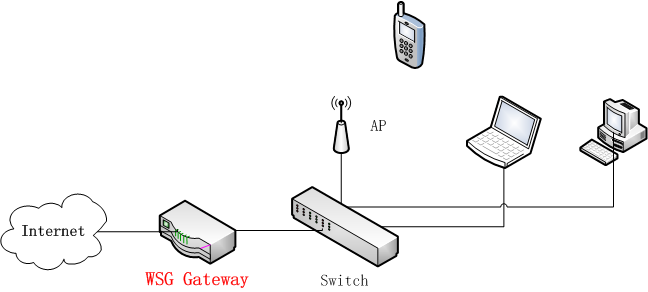
- WSG appliance can act as a firewall/gateway.
- If there is an existing firewall, WSG shall be connected after the firewall.
3.2 Setup Steps
- Internet cable connected to WAN1.
- Laptop connect to LAN.
- Power on.
- Set laptop adapter to "obtain an IP address automatically" or assign a static IP "192.168.10.x".
3.3 Configuration Wizard
- Navigate to: http://192.168.10.1
- Username: admin, password: 123456
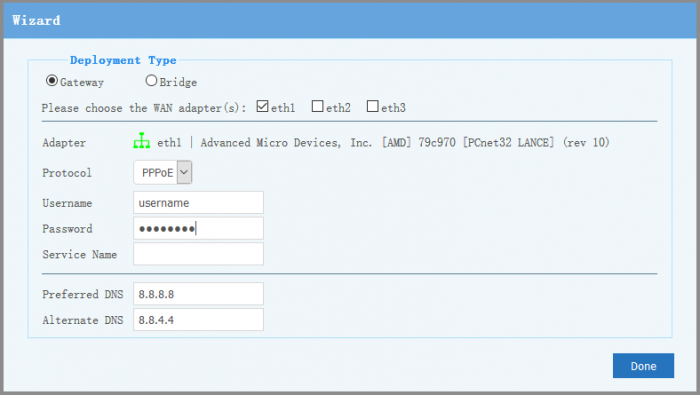
- Choose "Gateway" as the "deployment type" and setup the WAN interface(s), interface map:
- eth0 -> LAN
- eth1 -> WAN1
- eth2 -> WAN2
- eth3 -> WAN3
- eth4 -> WAN4
- eth5 -> WAN5
- For PPPoE, you need to input correct username/password from your ISP.
4 Bridge Deployment
4.1 Topology
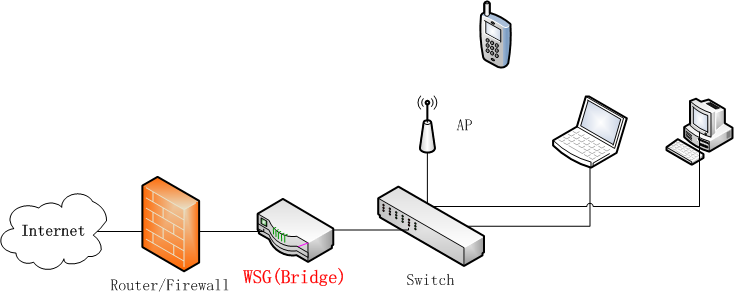
- Each bridge have two ports. For example, you can bridge "LAN" and "WAN1" ports together:
- The WSG device shall sit between router/firewall and core switch.
- The core switch shall be connected to the LAN port.
- Router/firewall shall be connected to the WAN1 port.
4.2 Setup Steps
- Laptop connect to LAN.
- Power on.
- Set laptop adapter to "obtain an IP address automatically" or assign a static IP "192.168.10.x".
4.3 Configuration Wizard
- Navigate to: http://192.168.10.1
- Username: admin, password: 123456
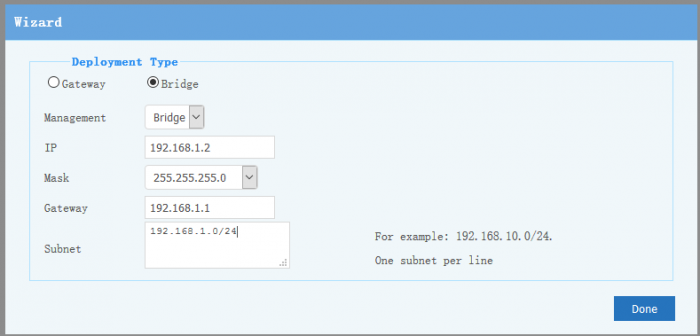
- Choose "Bridge" as the "deployment type" and setup:
- Management IP address: a valid local subnet IP address for web UI management.
- Gateway: for WSG appliance to access internet for upgrade.
- Subnet: lan subnets to be managed, for example: 192.168.1.0/24(can be different subnet to the management IP).
- Please note: when bridge management IP is applied, you need to modify laptop IP and re-access web UI via the new IP address.
- Please note: if bridge is in a different subnet, you need to add "static routing" in "Config"->"Routing".
- Please note: if bridge ip is unreachable, you can set a separate management interface.
5 Passby Deployment
5.1 Topology
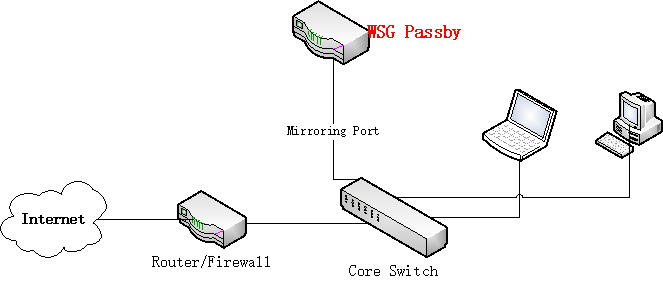
- You need to setup a mirroring port in your switch first.
- The observ port shall be connected to the mirroring port.
- The management port is for NGF system to access network. Management port VLAN shall be able to reach the client VLANs.
6 Failure Recovery
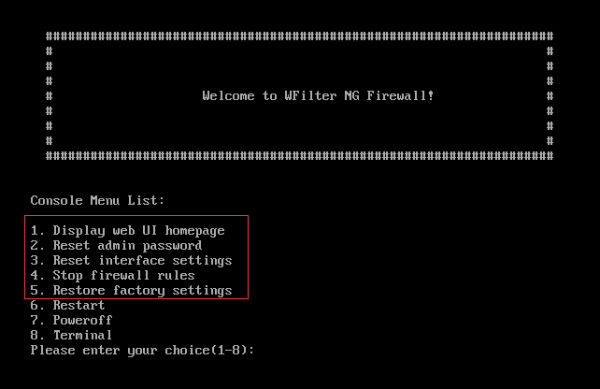
In case the web UI is unavailable, you need to connect a monitor to the VGA connector and access console for failure recovery.
7 Warranty Expiration Date
To query WSG appliance warranty expiration date, please check the serial no in bottom of your device. You can query warranty date online at WSG Appliances
